 Skip to content
If you want to make a network of online stores so they’re easier to manage, no problem. You can use the WordPress eCommerce plugin, WooCommerce, as well as WordPress Multisite to create a WooCommerce multistore.
Here’s how to install, set up and update a WooCommerce multistore so you can get started in WordPress eCommerce.
How to Install and Set Up WooCommerce WordPress Multisite Network
To set up a WooCommerce multistore, you first need to install WordPress on your server. For details, check out How to Install WordPress in the WordPress Codex.
Next, enable Multisite by following the WordPress Codex’s page: Create a Network.
For details on WordPress eCommerce and WooCommerce multistore networks, check out WordPress Multisite and WooCommerce Multisite: An Overview.
How to Install WooCommerce
Now you’re ready to install WooCommerce, which is a free WordPress eCommerce plugin. Once it’s installed, you can network activate it to create a WooCommerce multistore.
Start by logging into the admin dashboard of your WordPress site. Make sure you’re logged in as the super administrator so you’re able to manage installed plugins for the Multisite network.
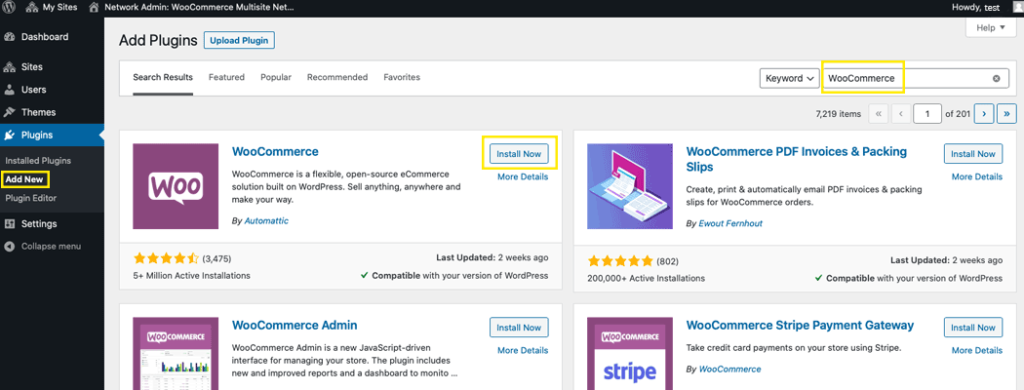
Then, in the menu on the left, go to Plugins > Add New. In the search bar towards the top, right hand side, type in “WooCommerce”.
A list of plugins should dynamically populate the page.
For the WooCommerce plugin that should now be listed on the page, click its corresponding Install Now button.
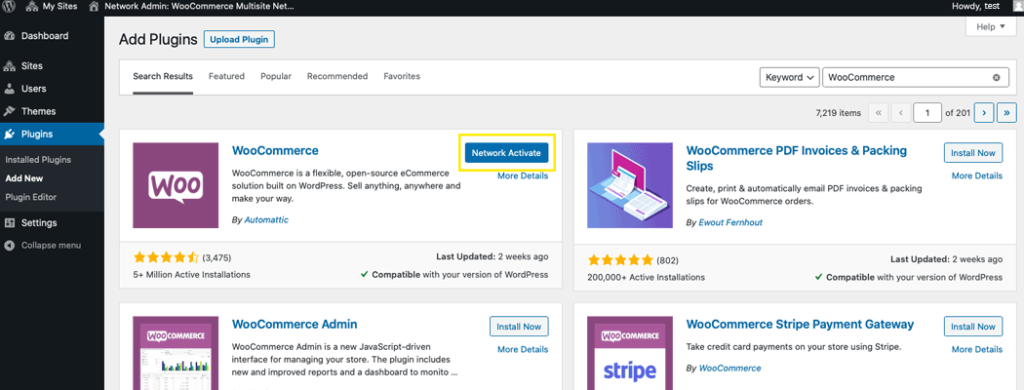
After about a few seconds, WooCommerce will have been installed at the Install Now button will say Network Activate. Click on it.
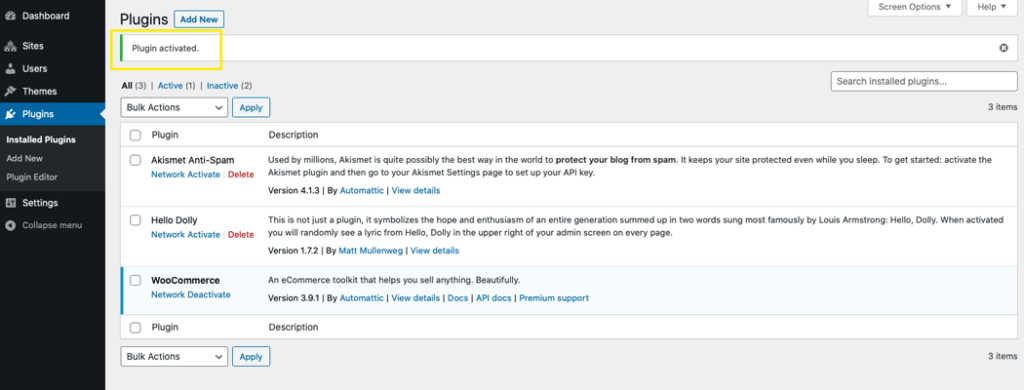
You’ll be redirected to the Plugins page. A message will be displayed towards the top of the page to let you know the plugin has been activated.
How to Set Up a WooCommerce Multistore
Now that WooCommerce has been installed and activated on the network-level, you can go ahead and set it up.
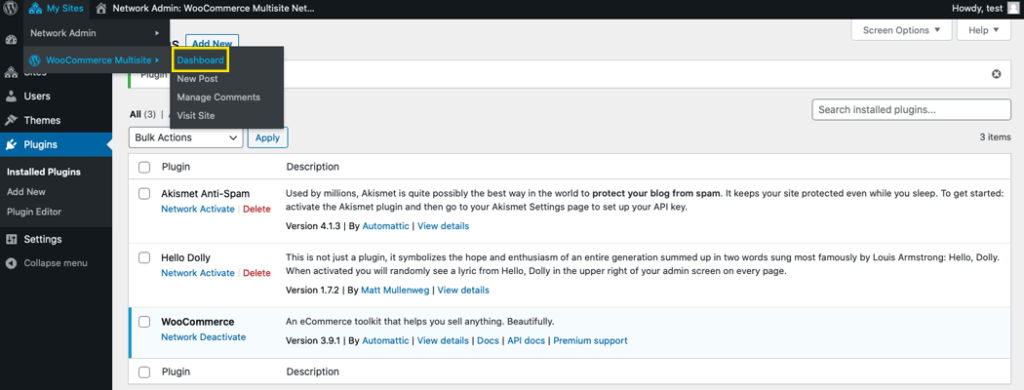
Be sure you’re logged into your WordPress site as the super admin and go to the dashboard of your main site in the network.
Hover over My Sites in the admin bar, then on your main site that’s listed. Then, click on the Dashboard link.
Configuring with the WooCommerce Setup Wizard
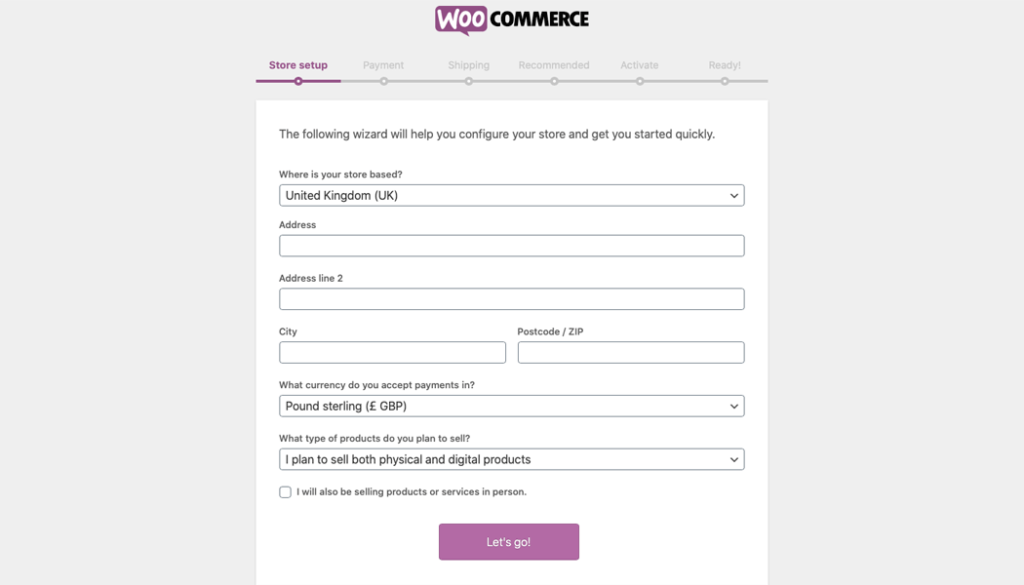
You’ll be directed to the WooCommerce setup wizard. You can set up the basic details of your WordPress eCommerce and WooCommerce multistore network.
If you would rather configure certain steps later, you can click the Skip this Step link that’s located at the bottom of each page. You can access the options later under the WooCommerce tab in your admin dashboard.
Start by filling in your business’ address, the currency you want to use for payments, the type of products you want to sell and if you will sell products online as well as in-person.
Then, click the Let’s Go button.
Before moving on to the next step, you’re asked if you want to enable tracking so WooCommerce can be improved based on how it’s used. This is optional.
If you would like to participate, click the checkbox Enable usage tracking and help improve WooCommerce.
If you don’t want to enable usage tracking, leave the box unchecked.
Then, click Continue.
Setting Up Payments
Next, you can choose how you want to accept payments. The Stripe option is enabled by default. You can click the toggle button next to it if you want to disable it.
You can choose to click the toggle button next to the PayPal option if you want to turn on this form of payment.
If you want to accept offline payments, click the arrow towards the right of that option and click the toggle buttons next to the forms of payment you want to accept.
You can choose from:
- Check payments
- Bank transfers
- Cash on delivery
When you have made the selections you want, click Continue.

Keep in mind you can install extensions later if you want to accept other forms of payment.
At this point in the setup, additional plugins will also be automatically installed based on your selections.
This can include:
Configuring Shipping Options
On the next page of the setup wizard, you can choose the areas you want to ship to as well as the shipping method, and the units of measurement you want to use for package weights and dimensions.
You can choose to offer flat-rate or free shipping. If you don’t want to enable either of these types of shipping for certain areas, you can click the toggle buttons next to the shipping zones listed to deactivate these options.
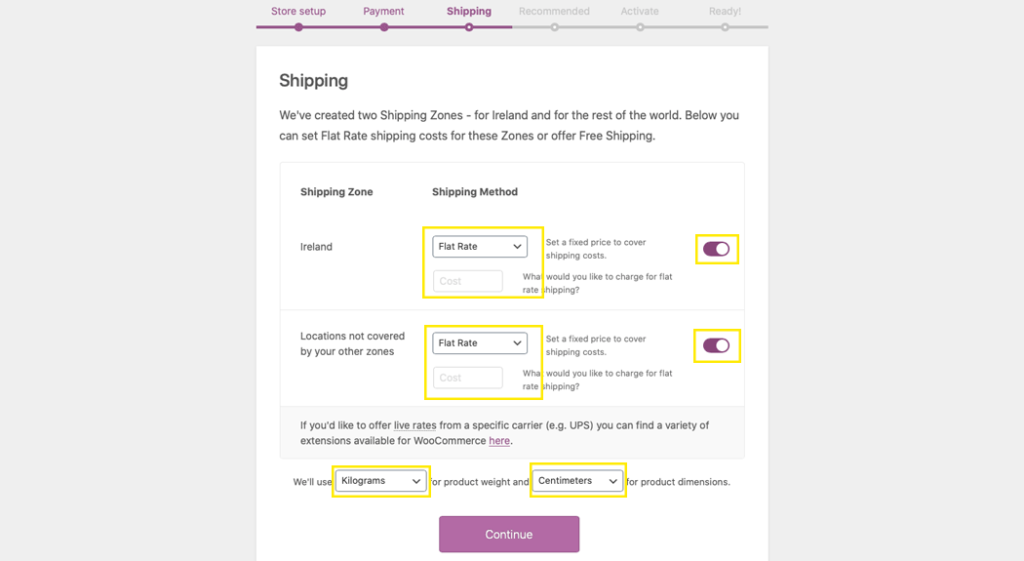
After you have chosen the settings you want, click Continue once again.
Finishing the WooCommerce Multistore Setup
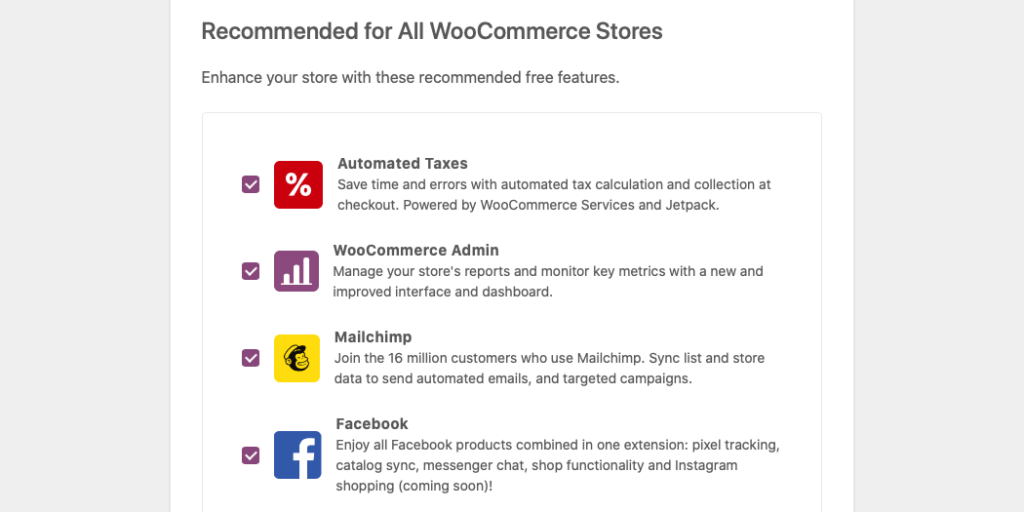
Then, you can choose to install additional recommended plugins:
You can also choose to enable automatic tax calculations with the WooCommerce Services and Jetpack plugins that have already been installed at this point.
Make the selections you want, then click Continue.
Then, you’re asked to activate Jetpack. Click the Continue with Jetpack button to set it up.
Once that’s done, click Finish setting up your store to go to the last setup page.
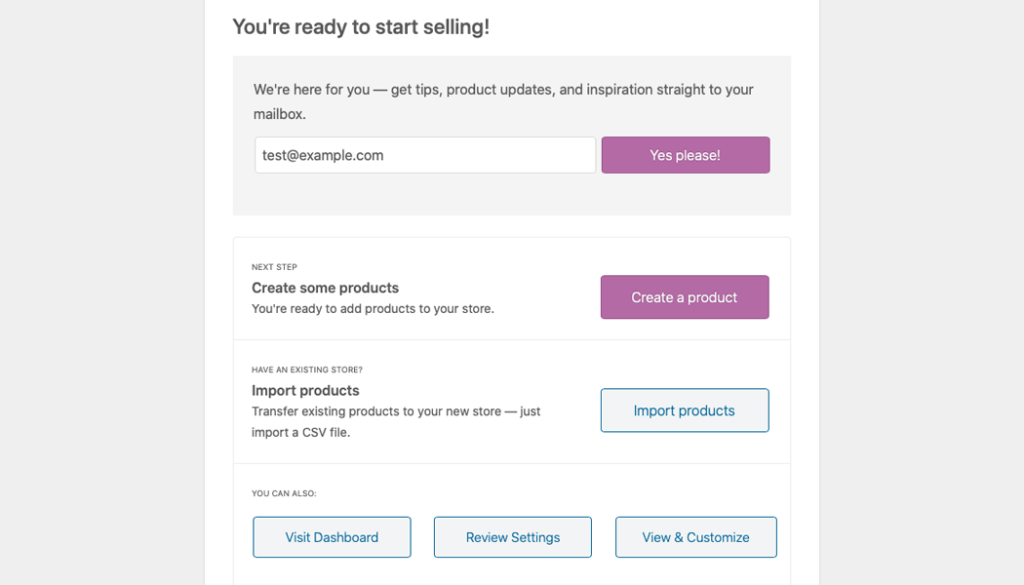
From here, your first WordPress eCommerce store is set up and ready for you to add products.
On this last page, you can sign up for a WooCommerce newsletter or you can click any one of the buttons to:
- Create a product
- Import products
- Visit dashboard
- Review settings
- View and customize
How to Further Set Up WooCommerce
Now that you’re done setting up your first WordPress eCommerce store for your main site in your WooCommerce multistore network, you can access additional settings. You can also change the options you just set.
In the admin dashboard for your main site, go to WooCommerce > Settings. You can manage your products under Products and view reports under the Analytics menu items.
You can also install additional WooCommerce extensions if you want at this point.
Creating More Online Stores
You can also create multiple online stores in your WooCommerce multistore network. First, you need to create additional sites.
Make sure you’re still logged in as the super admin. Then, In the admin bar at the top of the page, go to My Sites > Network Admin > Sites.
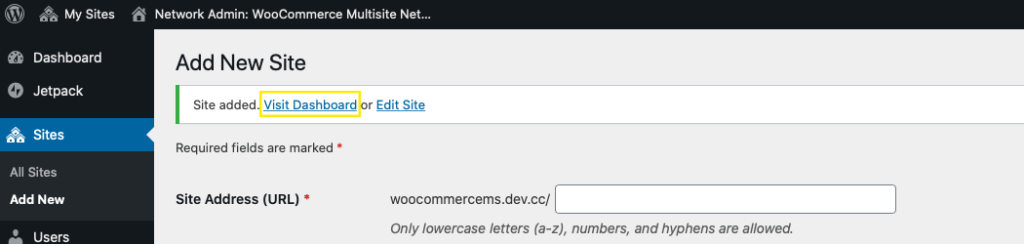
Click Add New towards the top of the page.
Fill in the details for the site address, title, language and admin email. Then, click Add Site.

Once the site has been created, you’ll see an admin message towards the top of the page letting you know. In it, there’s a link to Visit Dashboard. Click on it.
You’ll be redirected to the WooCommerce setup wizard where you can repeat the steps outlined above to set up a new WordPress eCommerce store.
You can repeat these steps for as many WooCommerce multistore sites you want to create.
How to Update WooCommerce: Settings Updated Across All Sites?
Now that you have installed and set up your WordPress eCommerce stores, it’s imperative that you keep them all updated.
This is essential to ensure the security of your WooCommerce multistore network. Updates also may include new useful features for your network as well.
When you update your WordPress eCommerce network, it’s important to note that each subsite as well as the main site are all managed separately.
While you can update the WooCommerce plugin through the super admin dashboard and all the sites in the network will be updated, you can’t do that for individual settings.
This means that if you wanted to provide free shipping across all stores in your network, there’s no way you can update all the sites at one time. They all have to be updated manually.
That’s not to say you couldn’t create a custom plugin to achieve this, though, it would require you to develop your own WooCommerce extension or WordPress plugin.
Or, if you want to create a custom solution for your WooCommerce multistore network, but don’t want to go the DIY route, you can hire certified WooCommerce experts to handle it for you.
Updating the WooCommerce Multistore Network
When an update to WooCommerce becomes available as mentioned above, you can update your entire WooCommerce multistore network in a couple clicks.
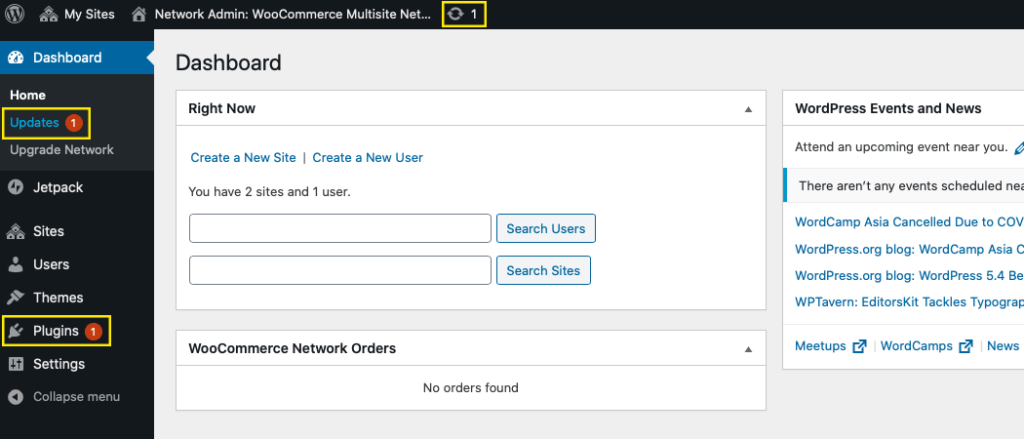
To do this, you can click on one of three options:
- The update button in the admin toolbar
- Dashboard > Updates
- Plugins menu item
No matter which option you choose, make sure you’re logged in as the super admin.
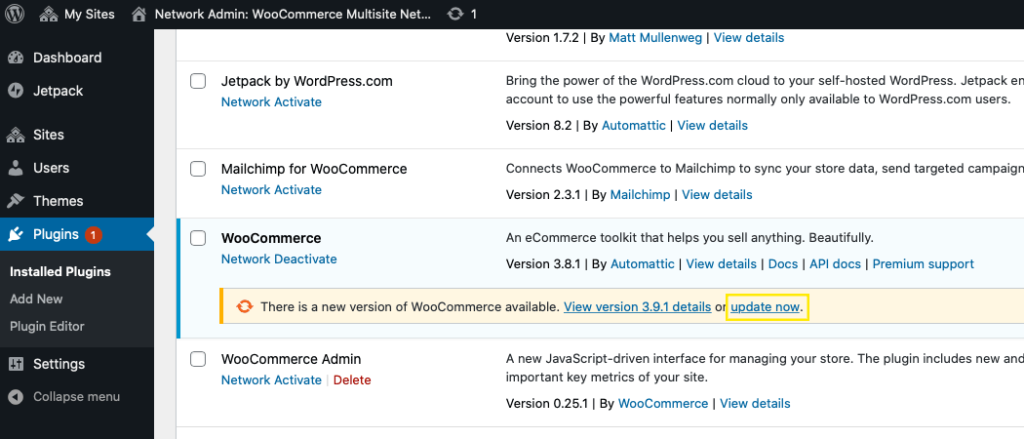
If you click the Plugins button, you can click on the update now link under the listed plugin that needs updating.
If you clicked one of the other two update buttons, you’re sent to the Updates page.
Under the Plugins heading, check the Select All box or just the one for WooCommerce. Then, click Update Plugins.
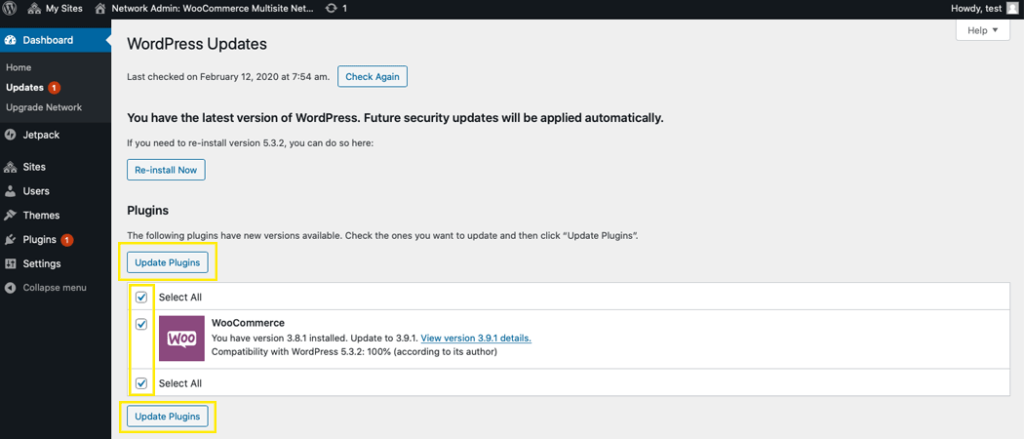
When WooCommerce has been updated, you’ll see a confirmation message on a new page.
Wrapping Up
When you need to create multiple WordPress eCommerce stores, a WooCommerce multistore network is an excellent option. You can quickly install, set up and update the network of stores in a matter of minutes.
Were you able to create a WooCommerce multistore network? Do you still need help with WordPress eCommerce? Share your experience in the comments below. You can also call on us and our verified WooCommerce experts will help you with your project.

I imagine you can ask questions here. I liked your text on WordPress multsite, especially on the part of Woocommerce, but there was a doubt: how is the use of the RESTful API in multisite Woocommerce? It’s viable? Need something more? I am planning to use subdomains for each branch of the store, which will use different access tokens.
Hi Helder,
Yes, you can use the REST API with WooCommerce for that. For details, you can check out the WooCommerce REST API Documentation and the WooCommerce REST API page on GitHub.
Best wishes,
Jenni
I am searching on google how to setup Woocommerce on WordPress and I find your post. And after reading your content, hopefully, now we can setup Woocommerce on WordPress easily. Thank you!
Hey Devid,
Oh lovely, I hope all goes well with the set up! Feel free to let me know if you have questions.
Best of luck,
Jenni
I have already a woo-commerce website, and now I would like to create a multi-woo-commerce website from my existing woo-commerce, Is it possible to do that if yes please help me
Hey Rishabh,
Yes, you certainly can have a WooCommerce-enabled Multisite network if you enable WooCommerce network-wide after installing Multisite.
If you have any more questions, feel free to reply.
Best,
Jenni